When Should You Check and Replace the Tail Lights on Your Vehicle?

Tail lights are a crucial component of your vehicle’s safety and visibility. This guide aims to provide clarity on when you should check and replace your tail lights. Explore the factors influencing the lifespan of tail lights, including usage, environmental conditions, and potential issues. Learn to recognize signs of wear, damage, or reduced brightness, indicating it’s time for replacement. By understanding these cues and incorporating routine checks, you contribute to the overall safety of your vehicle on the road. Illuminate your path with confidence by knowing when to check and replace the guiding lights of your vehicle.

Contents
Understanding the Importance of Tail Lights
Tail lights are an integral part of your vehicle’s lighting system. They serve two primary purposes: to indicate your presence on the road to other drivers and to communicate your intentions while driving. These lights are especially crucial during low-light conditions, such as at night or in adverse weather conditions.
By illuminating the rear of your vehicle, tail lights allow other drivers to gauge its size and distance. Additionally, they indicate when you are braking or signaling a turn, providing vital information to those sharing the road with you. Without functional tail lights, your vehicle becomes a hazard, increasing the likelihood of accidents.
Signs that Indicate the Need for Replacement
While it is essential to regularly check your tail lights, there are certain signs that indicate the need for immediate replacement. These signs include:
Dim or Flickering Lights
If you notice that your tail lights appear dim or flicker intermittently, it is a clear indication that they are not functioning correctly. Dim lights may reduce your visibility on the road, while flickering lights can confuse other drivers and make it difficult for them to anticipate your actions. In such cases, replacing the tail lights is imperative.
Cracked or Damaged Lenses
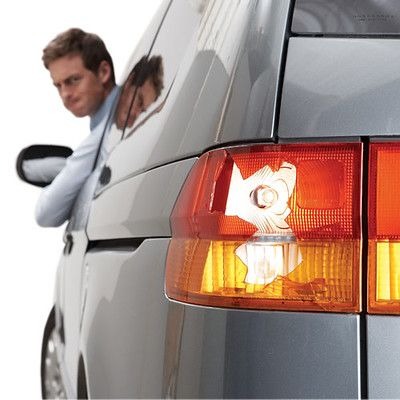
The lenses covering your tail lights can become cracked or damaged due to various reasons like accidents, weathering, or debris impact. Cracks in the lenses can allow moisture to seep in, potentially damaging the internal components of the tail lights. Moreover, damaged lenses can also reduce the brightness and visibility of the lights. If you notice any cracks or damages, it is crucial to replace them promptly.
Complete Failure or Non-Functioning Lights
If your tail lights have completely stopped functioning or certain bulbs are not lighting up, it is an obvious sign that replacement is necessary. Non-functioning lights not only compromise your safety but also make it difficult for other drivers to anticipate your movements.
Discoloration or Fading
Over time, exposure to sunlight and environmental elements can cause discoloration or fading of the tail light lenses. Discolored or faded lenses may reduce the brightness and clarity of the lights, compromising their effectiveness. In such cases, replacing the lenses or the entire tail light assembly is recommended.
See more: Things you need to know when maintaining your vehicle’s fuel system
How to Check Tail Lights
Regularly checking your tail lights can help you identify any issues early on and prevent potential problems. Here are the steps to check your tail lights:
Find a Suitable Location
Park your vehicle in a well-lit area where you can easily observe the rear of your vehicle.
Activate the Lights
Turn on your vehicle’s headlights and engage the parking brake. Activate your tail lights by switching on the parking or running lights.
Inspect Each Light
Walk around the rear of your vehicle and visually inspect each tail light individually. Check for any signs of dimness, flickering, cracks, damages, or non-functioning bulbs.
Test Brake Lights and Turn Signals
Once you have inspected the parking lights, have someone assist you in testing the brake lights and turn signals. Apply the brakes one at a time while your assistant observes if both brake lights illuminate simultaneously. Similarly, test each turn signal individually to ensure they are working correctly.
How to Replace Tail Lights
If you have identified any issues during the inspection or encountered non-functioning tail lights, it is crucial to replace them promptly. Here is a step-by-step guide on how to replace tail lights:
Determine the Type of Tail Light Assembly
Tail light assemblies can vary depending on your vehicle’s make and model. Determine whether you need to replace just a bulb or the entire assembly by referring to your vehicle’s manual or consulting with a professional.
Gather the Necessary Tools
To replace the tail lights, you may require basic tools such as a screwdriver or socket wrench set. Gather these tools before proceeding with the replacement process.
Access the Tail Light Housing
Depending on your vehicle’s construction, you may need to access the tail light housing from inside the trunk or underneath a rear panel. Refer to your vehicle’s manual for specific instructions on accessing the tail light housing.
Remove the Defective Tail Light
Once you have accessed the housing, carefully disconnect any wiring connectors and remove the screws or bolts securing the tail light assembly in place. Gently pull out the defective assembly from its position.
Install the New Tail Light Assembly
Position the new tail light assembly correctly and secure it with screws or bolts as per the manufacturer’s instructions. Reconnect any wiring connectors that were disconnected during removal.
Test the Tail Lights
After replacing the tail light assembly, activate your vehicle’s lights and test each function – parking lights, brake lights, and turn signals – to ensure they are functioning correctly.
Maintenance Tips for Tail Lights
To prolong the lifespan of your tail lights and ensure optimal performance, consider implementing these maintenance tips:
Clean Your Tail Lights Regularly
Use a mild detergent and water solution along with a soft cloth or sponge to clean your tail lights regularly. This helps remove dirt, grime, and other contaminants that can accumulate on the lenses, ensuring maximum brightness and visibility.
Inspect and Replace Bulbs as Needed
Check your tail light bulbs periodically for any signs of damage or wear. If a bulb appears dim or has stopped functioning altogether, replace it promptly with a new one of matching specifications.
Protect Your Tail Lights from Damage
Avoid backing into objects or driving too close to structures that can potentially damage your tail lights. Additionally, consider installing protective films or covers on your tail light lenses to shield them from scratches and impact damage.
Regularly Inspect Wiring Connections
Ensure that all wiring connections related to your tail lights are secure and free from corrosion. Loose or corroded connections can lead to malfunctioning lights or intermittent issues.
Seek Professional Assistance if Needed
If you are unsure about checking or replacing your tail lights yourself, it is always best to seek professional assistance from a qualified mechanic or automotive technician.
Timing and Tips for Checking and Replacing Your Vehicle’s Tail Lights
Regularly checking and replacing tail lights is crucial for maintaining road safety and visibility. By understanding the importance of functional tail lights, identifying signs that indicate replacement is necessary, and following proper inspection and replacement procedures, you can ensure that your vehicle remains visible to others on the road. Implementing regular maintenance practices will not only enhance your safety but also contribute to a safer driving experience for everyone on the road.
See more news at: car care vip


