How to Check and Replace Electronic Components on Your Vehicle

In the era of advanced automotive electronics, understanding how to check and replace electronic components is crucial for vehicle maintenance. This guide is designed to empower vehicle owners with the knowledge and skills needed to navigate the intricacies of electronic systems. From diagnostics to hands-on replacements, we’ll cover the essentials of ensuring your vehicle’s electronic components are in top condition. Discover the steps to identify issues, perform checks, and confidently replace electronic components, contributing to the overall health and performance of your vehicle. Step into the world of electronics empowerment with this comprehensive guide for checking and replacing electronic components in your vehicle.

Contents
- 1 Understanding Electronic Components in Vehicles
- 2 Signs of Electronic Component Failure
- 3 Essential Tools for Checking and Replacing Electronic Components
- 4 Steps to Check Electronic Components
- 5 Steps to Replace Electronic Components
- 6 Mastering Vehicle Electronics – A Comprehensive Guide to Checking and Replacing Components
Understanding Electronic Components in Vehicles
Before we dive into the process of checking and replacing electronic components, it’s essential to have a basic understanding of the common electronic components found in modern vehicles. Here are some of the key components you may encounter:
Engine Control Unit (ECU)
The Engine Control Unit, commonly referred to as the ECU, is responsible for managing various engine functions, such as fuel injection, ignition timing, and emissions control. It receives data from various sensors and adjusts the engine’s performance accordingly.
Sensors
Sensors are crucial electronic components that provide data to the ECU or other control modules in your vehicle. Some common sensors include the oxygen sensor, mass airflow sensor, and throttle position sensor. These sensors help monitor and regulate various systems, ensuring optimal performance.
Actuators
Actuators are electronic components that convert electrical signals into physical action. Examples of actuators include fuel injectors, ignition coils, and solenoids. They play a crucial role in controlling various systems in your vehicle.
Control Modules
Control modules are responsible for managing specific functions within your vehicle. Examples include the transmission control module, ABS control module, and body control module. These modules receive data from sensors and send commands to actuators to ensure smooth operation.
See more: A Comprehensive Guide on How to Maintain the Autopilot System
Signs of Electronic Component Failure
Before you start checking and replacing electronic components, it’s important to identify potential signs of component failure. Here are some common indicators that may suggest an electronic component issue:
Warning Lights
Illumination of warning lights on your vehicle’s dashboard, such as the check engine light or ABS light, can indicate a problem with one or more electronic components.
Poor Performance
If you notice a decrease in your vehicle’s performance, such as reduced power or sluggish acceleration, it could be due to a faulty electronic component.
Unusual Noises
Unusual noises coming from your vehicle could be a result of a failing electronic component, particularly in systems like the audio system or climate control.
Erratic Behavior
Erratic behavior of various systems, such as sudden changes in engine idle speed or intermittent electrical issues, may point towards faulty electronic components.
Essential Tools for Checking and Replacing Electronic Components
Before you begin inspecting and replacing electronic components, it’s essential to have the right tools at hand. Here are some tools you may need:
Digital Multimeter
A digital multimeter is a versatile tool that helps measure voltage, current, and resistance. It is crucial for diagnosing electrical issues in your vehicle.
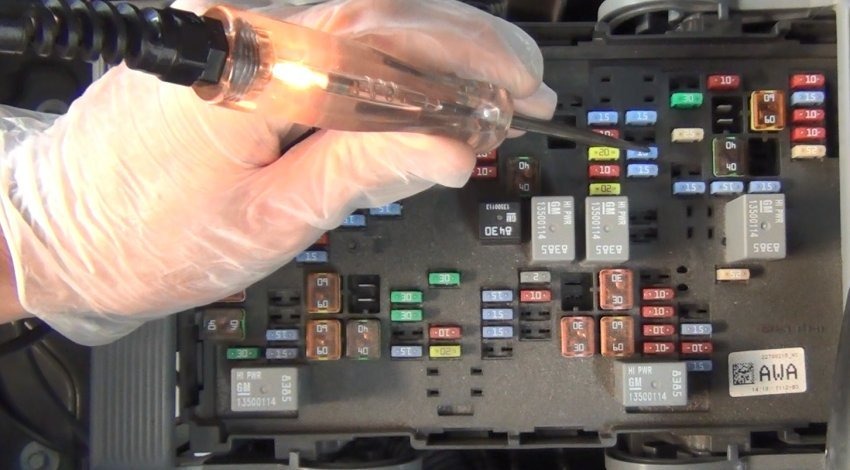
Circuit Tester
A circuit tester allows you to check if a particular circuit is receiving power or if there is a break in the wiring.
Diagnostic Scanner
A diagnostic scanner is used to retrieve fault codes stored in the vehicle’s onboard computer system. It provides valuable information about which electronic component may be causing issues.
Basic Hand Tools
Standard hand tools like screwdrivers, pliers, and wrenches are necessary for removing and installing electronic components.
Steps to Check Electronic Components
Now that you have a basic understanding of the key electronic components and the necessary tools let’s walk through the process of checking them:
Identify the Problematic System
If you’ve noticed specific issues with your vehicle, such as poor fuel efficiency or an unresponsive audio system, identify the system that may be causing the problem. This will help narrow down the electronic components you need to inspect.
Consult the Vehicle’s Service Manual
Refer to your vehicle’s service manual to locate the specific electronic components related to the problematic system. The manual will also provide you with diagnostic procedures and specifications for testing each component.
Inspect Wiring Connections
Start by inspecting the wiring connections related to the problematic component. Look for loose connections, damaged wires, or signs of corrosion. Ensure that all connections are secure and free from any debris or moisture.
Test Voltage and Resistance
Using a digital multimeter, test the voltage and resistance across the terminals of the electronic component. Compare the readings with the specifications provided in your vehicle’s service manual. If the readings are outside the recommended range, it may indicate a faulty component.
Check for Power Supply
Using a circuit tester or multimeter, check if there is power supply reaching the electronic component. This will help identify if there is an issue with the power supply circuit.
Use a Diagnostic Scanner
If you’re unable to identify the problem through visual inspection or basic tests, connect a diagnostic scanner to retrieve any fault codes stored in your vehicle’s computer system. These codes will provide valuable insights into potential issues with specific components.
Steps to Replace Electronic Components
Once you have identified a faulty electronic component through testing, it’s time to replace it with a new one. Here are the general steps involved:
Source the Replacement Component
Identify the appropriate replacement component based on your vehicle’s make, model, and year. You can source it from an authorized dealer, aftermarket supplier, or reputable online stores.
Disconnect and Remove the Old Component
Start by disconnecting any electrical connectors or wiring harnesses attached to the faulty component. Next, remove any mounting bolts or screws that secure it in place. Carefully remove the old component from its location.
Install the New Component
Position the new component in place and secure it using the mounting bolts/screws removed earlier. Ensure proper alignment before tightening them. Reconnect any electrical connectors or wiring harnesses that were disconnected earlier.
Test the System
Once you have replaced the faulty component, test the system to ensure proper functionality. Start your vehicle and check for any warning lights or abnormal behavior. Perform any necessary calibration or initialization procedures as specified in your vehicle’s service manual.
Mastering Vehicle Electronics – A Comprehensive Guide to Checking and Replacing Components
Electronic components play a crucial role in ensuring optimal performance and functionality of various systems in your vehicle. With a basic understanding of these components and proper diagnostic techniques, you can effectively check and replace them when needed. However, if you are unsure or uncomfortable with performing these tasks yourself, it is always recommended to consult a qualified automotive technician for assistance. Remember to prioritize safety when working with electrical systems in your vehicle.
See more news at: car care vip


